Saturday, December 31, 2011

Peppermint Candy Decoration

I got this idea for a Christmas decoration from a sales catalog that came in the mail one day. I had a tall vase that I wasn't using and knew it would be the perfect size. I picked up a couple red and white stems and some peppermint candies. I had to look in a couple different stores before I finally found the candies that were white and didn't have a yellow tint to them. 
I had the most luck putting the stems in first and then the candy. This will definitely be an easy one to store. Just take it apart and put it together again next year.

Friday, December 30, 2011

The Christmas Season

I hope everyone had a Merry Christmas and that 2012 brings you good health and happiness!


The Dahlhausers

The Dahlhausers


The annual white elephant gift

Dad barely moved from his chair for 4 days because of his sore hip


Saturday, December 24, 2011

Merry Christmas!

Merry Christmas to everyone! Enjoy your time with family and friends. I didn't get my wish of a white Christmas, but I did get this beautiful sunset shot over the Grotto pond.

Sunday, December 18, 2011

Chocolate Covered Cherries

Another Christmas favorite is homemade chocolate covered cherries. I remember standing at the stove helping (watching??) my Mom dip these when we were growing up. 
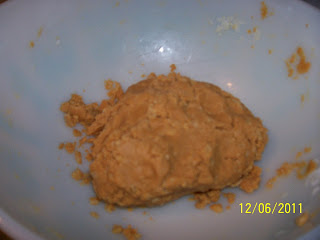
The dough is wrapped around maraschino cherries and then dipped in chocolate.
 The dough works best when it's chilled so I usually take a small batch at a time out of the frig as I'm wrapping. This year I was having quite the time keeping my hands free of warm, sticky dough. I could only do about 5-6 balls and then have to wash my hands. After a lot of frustration over the course of two days and only having half of them finished, I realized I should just add more powdered sugar. That did the trick! The dough needs to be soft, but not so soft that you can't handle it.
These look the same as peanut butter balls so I make sure I keep them in separate containers.

Since I wrote my last post, I happened to see a double boiler in the store on sale for $79. I'm sure there are less expensive ones, but that definitely wasn't the price I would have guessed.

Recipe:
2 lbs. powdered sugar
1 can sweetened condensed milk
1 stick melted oleo
2 tsp. vanilla
Mix together and chill. Wrap around whole maraschino cherries. Chill again before dipping.

Chocolate coating:
6 oz. semi-sweet chocolate chips
4 oz. Hershey candy bar
1/2 stick parafin

The longer these sit, the more the dough liquifies. Keeping them at room temperature rather than in the frig also helps.

Thursday, December 15, 2011

Peanut Butter Balls

I got this recipe from a former co-worker a couple of years ago, and it is now my favorite Christmas candy. There is nothing better than peanut butter and chocolate.

 After mixing up the dough, you roll it into balls.
 Then it's time to dip them in chocolate. I have my own version of a double boiler that I use so the chocolate stays thin enough. All you need is a sauce pan and a bowl that fits in it. I use the edge of a paring knife along the handle of the sauce pan so the bowl doesn't make a tight seal. Otherwise, when the water boils, it splatters all over. Sometimes you have to improvise in the kitchen...especially for an item that would only get used once a year.

 The finished product. I actually dip them twice so there's just a bit more chocolate!! Who doesn't think that's a great idea.
Recipe:
1 stick melted margarine
1 lb. powdered sugar (start with less)
2 cups creamy peanut butter
3 cups rice krispies (measure, then crush)
Mix by hand until smooth. Roll into 3/4" balls and dip. Cool on wax paper. Makes 6 dozen.
Thru trial and error, I have found that you want to start with a little less powdered sugar. If the dough is too dry, you'll have problems keeping the balls together.

Chocolate coating:
6 oz. semi-sweet chocolate chips
4 oz. Hershey candy bar
1/2 stick parafin
Friday, December 2, 2011

Christmas Cactus

I've had this Christmas cactus since my Grandma Dahlhauser's funeral four years ago....
 ....and it's finally blooming!  And at the right time of year. :-)
It has 10 blooms on it. I didn't do anything different this year than I have in the past (which means just pretty much watering it), but I sure am happy to see those gorgeous pink flowers.

Thursday, November 10, 2011

New Window

Last week I had a window replaced in my sunroom. It's the last big project I had on my list. It feels so great to them finished. Of course, there is still the small project list.

The center pane was rotting because of rain getting in.  
 Here they have the outside trim taken off.
Once they had the window out, it only took them about 10 minutes to get the new one into place. Good thing the snow hadn't started flying yet.

 They did a fabulous job on finishing the window. They matched the stain perfectly. The trim came off great and they were able to put it back up. You would never know that the picture below is the after shot. I didn't have to do a single touchup.
Instead of putting wood trim back on the outside, they put up vinyl. Yay, less maintenance for me!!

Tuesday, November 1, 2011

Botanical Center

Recently I was at the Botanical Center for some meetings and took a tour during lunch. It's been several years since I'd been there. There weren't a lot of plants blooming, but it was beautiful anyway.
Great picture of the koy pond with the dome reflection.

They had pumpkins out for fall but no mums yet.  I've heard that the poinsettia decorations at Christmas time are great, so I might have to make another trip.


Thursday, October 27, 2011

New Roof

Today another large project from my list was completed -- my house got a new roof. This was one of the things that I knew my house would need within a few years of buying it. The garage and the house (except for the addition) had two layers of shingles so it needed a complete tearoff.


Before

Before

They arrived at noon and when I stopped by at 1:30 they were already putting the tar paper on the garage and had the front half removed.
While I was there the foreman told me each of the front corners of the roof needed new plywood. They were rotten enough that if they had stepped on them, they would have fallen through.

 When I came home again about 5:00, they were just finishing up.
  On the picture below you can see that the three roof vents were removed and a ridge vent put in for better ventilation. Well, you can't really see the ridge vent, but you can see the others are gone.
 There was also a board that was soft right along where the addition was put on that was replaced. Not sure how I'm going to get up there and paint it??!!
After
Here's another shot of the before and the after. The picture makes the shingles look like they're kinda blue, but they're grey.
  
 They did a fabulous job in less than six hours!!